
Continuing to learn
In an attempt to broaden my understanding of the AWS infrastructure and to help me become more visible to potential employers and collaborators, I set out make my own site using AWS services. Before starting out, I had only briefly looked around in Route 53 around a year ago and really had no idea what I was doing with it, having tried to host a basic static page using an S3 bucket. Since that time, I had gained much more knowledge with how AWS services are used and how they interact with one another so I figured it was time to give it another shot.
Creating the host instance
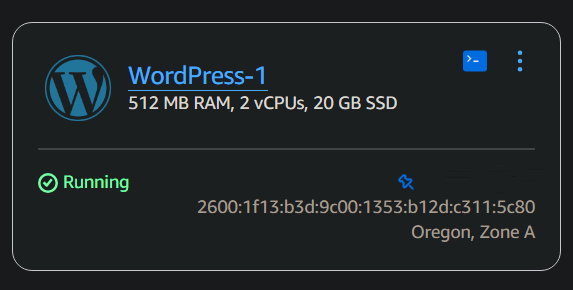
First, I needed to figure out how I was going to host the site, and after some research, I found that Amazon Lightsail was a viable option as a server. From my prior experience with AWS, I knew how to spin a Lightsail instance up, but had never used it to host a page. This was as good a time as any to learn, so I provisioned a basic instance with WordPress installed on it and was off to the races. Something I learned that I wasn’t aware of before is that I needed to configure a static IP address. Lightsail instances don’t come out of the box with a static IP so if the instance were to ever shut off and restart with a different IP, your whole site would break. Bad news! Thankfully the process of attaching the static IP was fairly simple to follow in the Lightsail documentation.
Configuring DNS
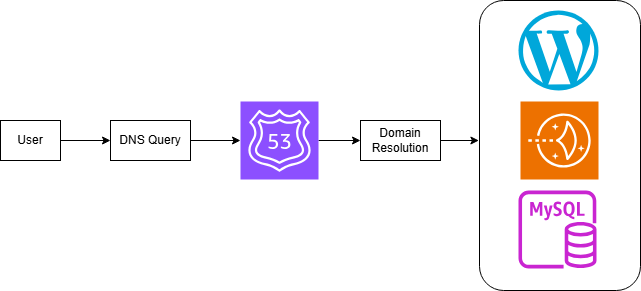
The next step was to register a domain, which I knew I could do within the AWS ecosystem with Route 53. Registering the domain (bhorvic.com) was easy enough, but next I had to learn about setting up a hosted zone and configuring DNS records, which I had basiclally no experience with. These records translate the more human-readable domain names (like google.com) into IP addresses that computers use to reference servers (like 192.168.1.1). There are several different records you can configure that have different uses, and I ended up using the four shown below.
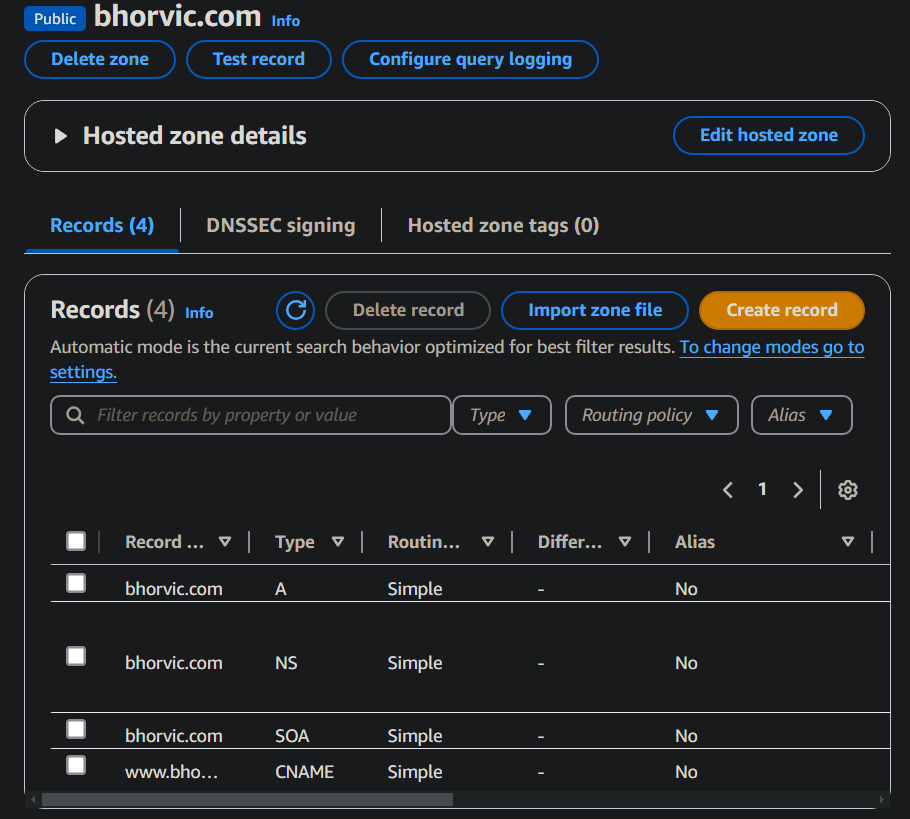
- A record (Address Record): Maps a domain name directly to an IPV4 address
- NS record (Name Server): Tells other DNS servers where to find information about the domain. These are generated by Route 53 when you create a hosted zone.
- SOA Record (Start of Authority): Includes details like the primary name server and email of domain administrator.
- CNAME Record (Canonical Name): Creates an alias for another domain name (www.bhorvic.com -> bhorvic.com).
Still with me? I still have a lot to learn about how these records work, but for this application that should be all I need. After setting up your records, you can use a tool like whatsmydns.net to watch as your DNS propagates all over the world!
Further setup and security
Now that I had a WordPress instance and a domain name attached to it, I needed to do some more setup. The site was not using HTTPS protocol, and I needed to enable this to be sure I was using best security practices. In order to enable this, I would need to connect to my instance using Secure Shell protocol (SSH), a common method of creating a secure connection to remote servers.
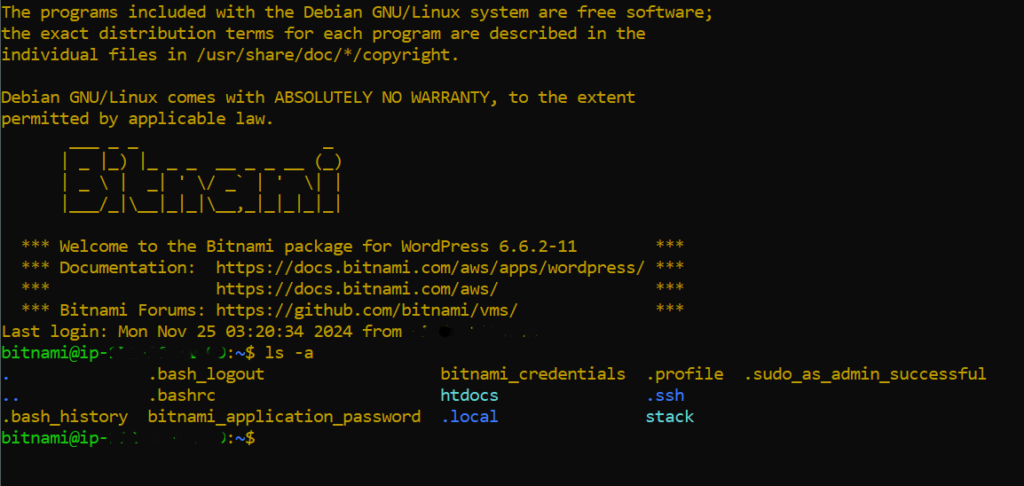
What the heck is Bitnami? It’s a package for WordPress that manages the application and it’s database. In AWS, Bitnami uses Amazon’s Relational Database service (RDS) to make a cloud based database for application to use. It also has some tools that we can use, such as the Bitnami HTTPS Configuration Tool, which I can use to request a Secure Sockets Layer (SSL) certificate that establishes a secure connection for everyone accessing this site.
This part of the setup process was what I found to be most challenging, as I had multiple hurdles to clear in order to obtain my SSL certificate. I ended up having to ‘phone a friend’ with much more web development experience to get this sorted out. That’s an important thing to remember with any project, there’s usually people who know more than you about what you’re trying to learn and it’s more than ok to ask for help! They helped me with executing the command to request a SSL certificate: sudo /opt/bitnami/bncert-tool, and what parameters I had to pass into it.
I wasn’t done yet! Things still weren’t quite working so we poked around until we found the correct configuration file and added this code as a module:
<IfModule mod_rewrite.c>
RewriteEngine On
RewriteCond %{HTTPS} off
RewriteRule ^(.*)$ https://%{HTTP_HOST}/$1 [R=301,L]
</ifModule>
If that looks like a bunch of gibberish, I get it. I would not have known to do that without help, but it forces all site requests to use HTTPS. With that whole fiasco out of way, My homepage loaded correctly using HTTPS.
You would think that would be the end of it, but there was one more thing that I had to take care of. Before I even registered my unique domain, I had already logged into the WordPress admin page and created the About Me page and uploaded my Resume.

This posed a unique issue that took me a while to figure out. My blog home page was loading correctly, but everything else would time out. I thought I had rerouted traffic to bhorvic.com, but something was broken. It took some digging, but I eventually came across the problem. Since I had already created some page content before I created my custom domain, Several entries were created in my instance’s database that were using outdated page references which was causing the other pages to try to go to my old static IP address I originally was using. This was the culprit for things timing out. What was the solution? Thankfully, WordPress has a plugin that you can use to ‘find and replace’ entries in your database without even having to write any SQL queries.
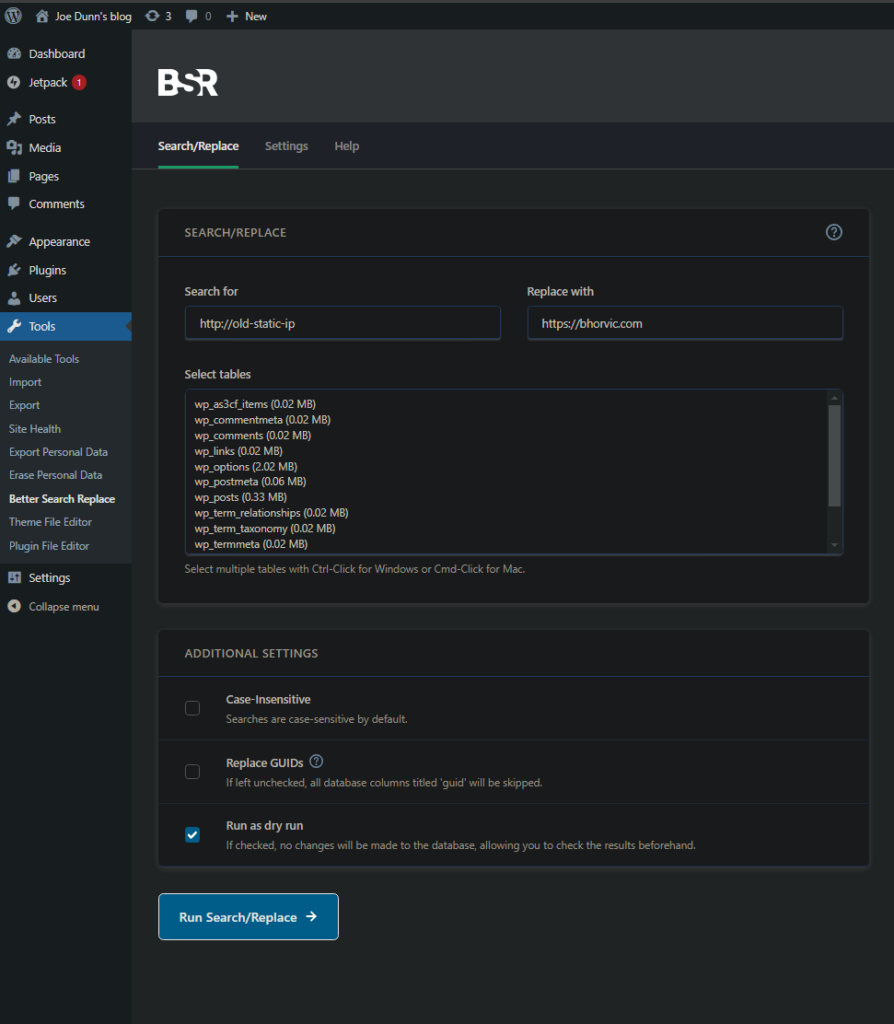
This plugin even lets you do a dry run without actually replacing anything so you don’t accidentally completely mess up your database, which is nice. Once I had that sorted out and cleared my browser’s cache, Everything finally was working correctly!
What did I learn?
This project ultimately led to the page you are currently viewing, a fully hosted blog with its own domain name. It was useful being able to apply some of the things I already knew about AWS, such as Lightsail, in a different application that I had not used before. The advantages of hosting this on a Lightsail instance were that it was still reasonably beginner friendly, but I was able to be exposed to some more complex concepts that I had no experience with prior.
Concepts such as DNS routing and SSL are more clear to me now than they were before undertaking this, and I feel like I have a better understanding of what goes into web hosting. The reason for doing this in the first place was to expand my skills in general as well as with AWS services and to have a place for me to document my progression as a developer. So in that regard, mission accomplished!
What next?
Though I have this site up and running with basic functionality, it’s still very rough around the edges and is going to take some work to get into a better state. I also have a lot more to learn about working with my instance using Bitnami and the command line, and before today I had never modified an Apache configuration file. I also plan on sharing some of the other things I work on here, so interested parties can collaborate and maybe learn something too. This can effectively serve as a portfolio to show potential employers as well.